
Tech II clone or VX GM Nano, I find myself using the Nano more often instead.
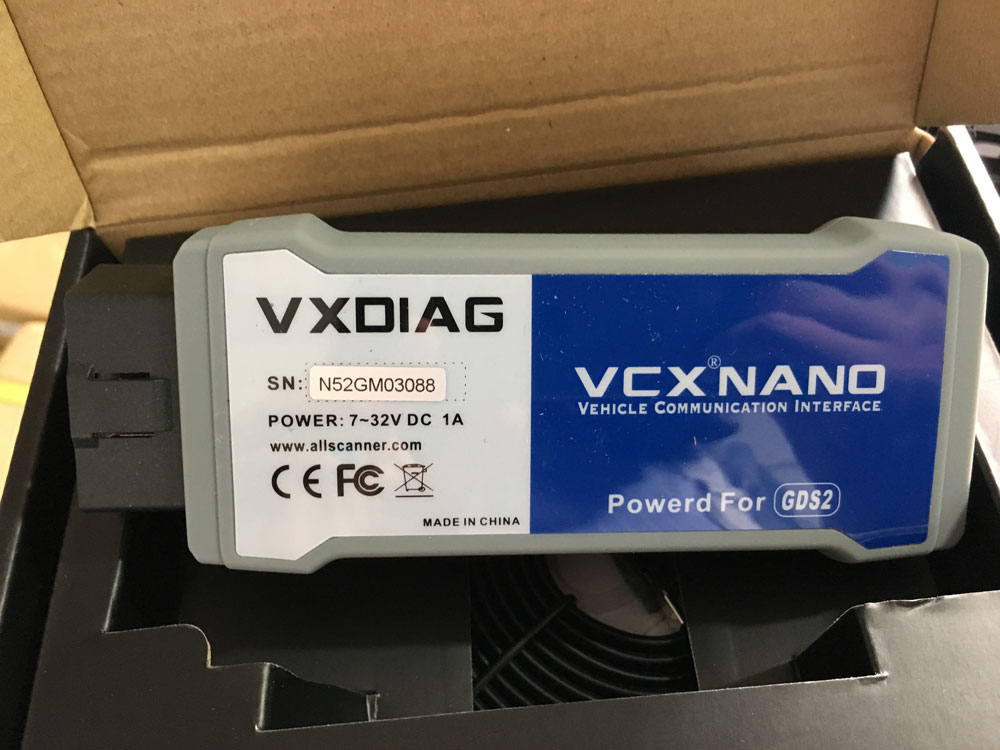
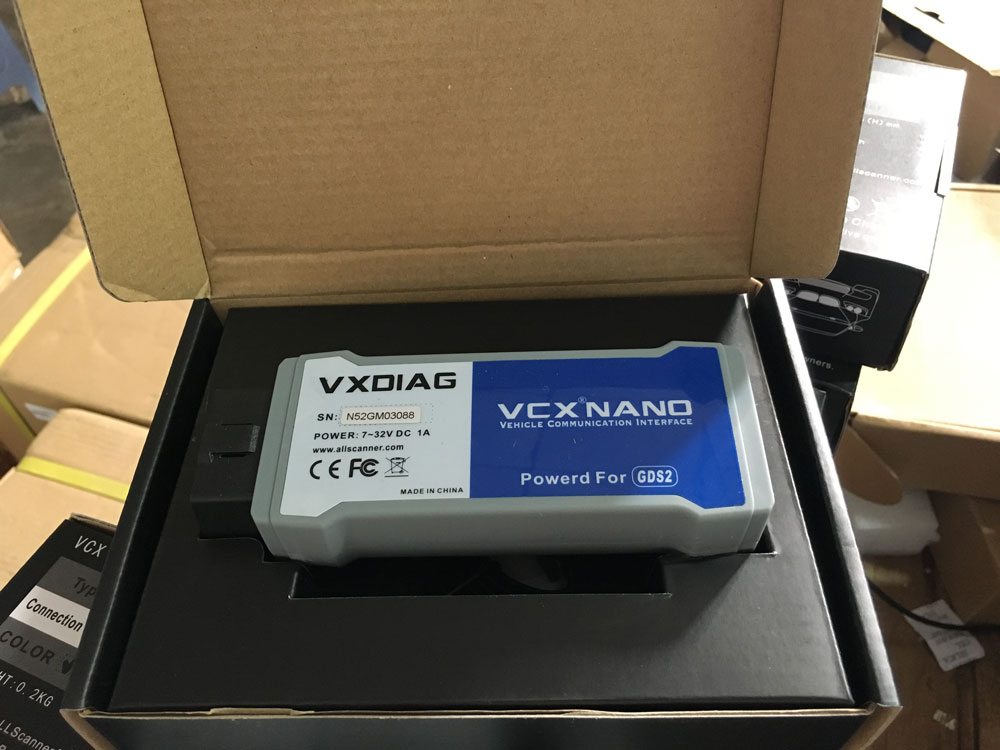
It works just like a Tech II running Tech2win on a laptop, works with TIS2000, as well TDS SPS and GDS2 for newer cars, since the VX GM Nano is a clone of the newer MDI units that GM is using now. The vxdiag vcx nano should perform like a GM MDI, it’s priced lower than the Clone Tech 2 & Clone GM MDI 2.
Using a GM Tech II, the tech II is a lot easy to use when you are in the car and behind the steering wheel instead.
Enter the VXDIAG VCX Nano for GM / Opel, For $119 on uobdii.com, I basically have the software version of a tech II device. I was able to unlock my radio in a matter of minutes and you can even reprogram modules. Have never used a real or upscale scan tool device so i can’t compare but just poking through some of the menus, it looks like i can do anything a tech II can. Cool thing is that the tech2win software runs just fine on my Windows 10 64bit laptop. Would be even cooler with a surface pro or similar tablet. I’m sure there are reasons for owning an actual tech II device over just software, but I wanted to try something different out of curiosity and explore other options for those that want an even cheaper alternative.
Question: how do you make the connection between the VCX Nano and the computer?
Curious how you connected the laptop to your obd 2 port?
Answer: you plug the device into the OBD2 port, and then you either use Wifi back to the laptop to connect that way ($119), or you can use a usb cable instead ($109).
WIFI Version
USB version
How to install VXDIAG GM for GDS2 / Tech2Win ?
Question: Did you mange to get the tech2 win to install on a 64 bit machine with 64 bit windows, or did you install tech2win and the rest of the software a 32windows machine only instead.
Answer: I did run the tech2win software straight from a Windows 10 64-bit laptop. Website says that GDS2 only runs from a Windows XP/7 32-bit computer.
Actually, I fired up the GDS2 software and that indeed runs off Windows XP. But it does come with the VM software. So far everything works under my Windows 10, but like I said the GDS2 is running in the VM software.
will not have a problem with Win2 tech working on your win 10 64 bit machine.
Just make sure that you have the scanner plugged into your usb port, do a double check in the device manger to make sure it showing up, and when you start Win2Tech, the program should open up, then you should get a pop up screen to select MDI, then the next screen to select the Nano device.
Hence its this pop up screen that I was not getting on my win 10 64 bit machine (could could not figure out a way to get it), so although the win2 tech program was open, it was not connected to the Nano instead.
On my win 7 32 bit machine, if the scanner is not plugged in before the Tech2win program is started, do not get the select device screens as well.
So to bottom line it, if you can get tech2win to work on a win 10 machine, then life if good. Hence you are working on a fast machine so tech2win works native, you can use the VM player to VM into GDS 2, and then just need to build another VM running a full install of XP so you can add TIS2000 to it to use SDS within that TIS200O program, and have the full Monty with the Nano.
If the Tech2 win will not work with your current win10 laptop, then here is where it starts to get rough instead. Hence on older Win 7 32 bit laptop usually has a centrino M single core processor in it ( or slower single core slower CPU), and although it runs fine for native win 7 to run Tech2win, it’s when you add in MS VM to it (VM player and VM workstation require a Multi processor CPU), that the VM shells run very slow to run GDS2 and TIS2000 in xp mode . So it still works for the two different configured VM’s that you will need configure differently, but the two VM’s are going to be brutally slow if your trying to keep everything on one machine.
So right now, I have tech2win loaded on my old win 7 latop, and the VM on my 64 bit machine. If I can score a cheap win tablet type that has a multi core process, then the game plan is to load win 10 32 bit on it, and use if for the full monty instead.
Note, still think that it a Intel verses AMD processor thing for the Win10 64 bit not working problem, since I do see extra drivers in the GM program needed for AMD processors, and these may be what is making the difference.
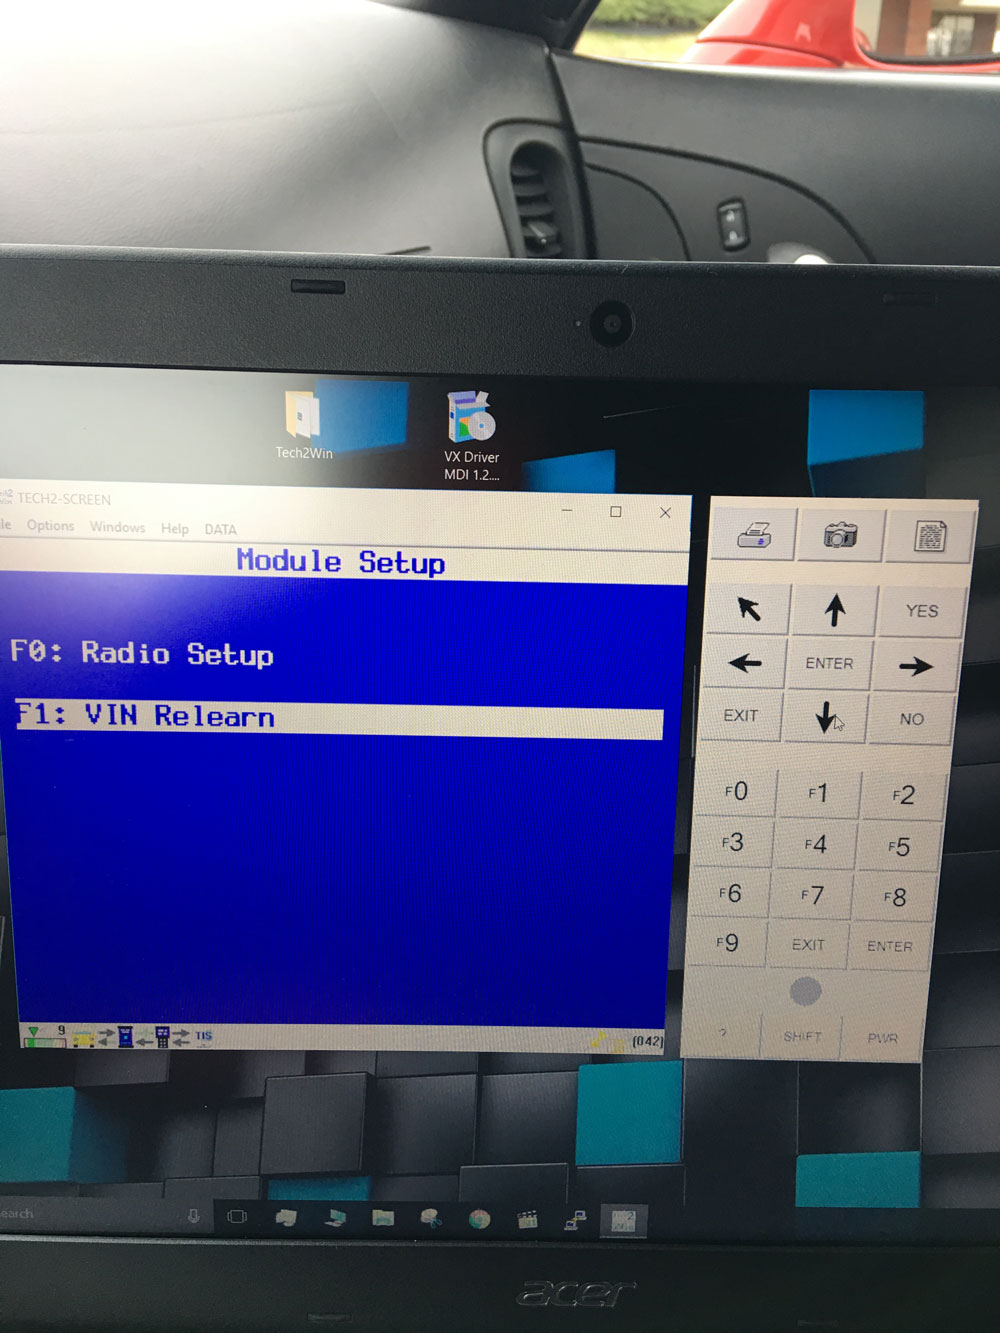
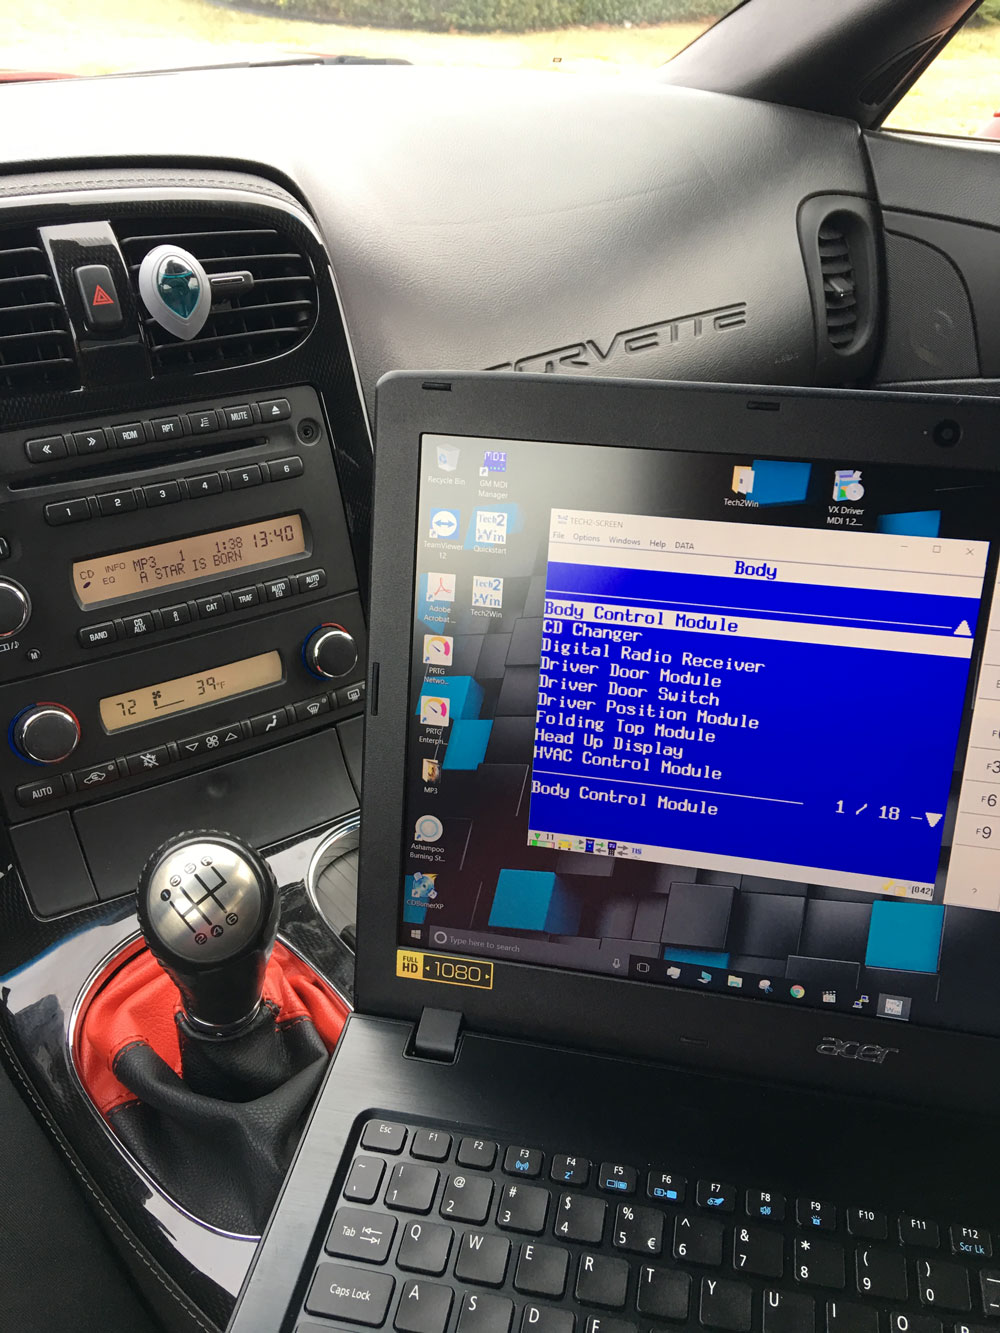
How to use vxdiag Nano tech2win and GDS2 to turn the HVAC after blow on?
Connect the scan tool.
Turn ON the ignition, with the engine OFF.
Select HVAC Module.
Select HVAC Systems Automatic.
Select Special Functions.
Select HVAC.
Select Afterblow Option.
Select ENTER to enable the afterblow.
When done, use the soft key to save changes.
When afterblow has been enabled by the scan tool the blower motor will operate between medium and high speed for 4 minutes after the engine has been turned off.
VXDIAG VCX NANO GM + TIS2000:
IT works!! ok for anyone trying to use the VXDIAG GM nano with SPS this is what you need to do (order is important):
*** please note you cannot use the VM that the VXDIAG package comes with (GDS2 VM). It’s configured in such a way it won’t work with the dongle crack and caused me a lot of head scratching to find this out.
1. Create a windows XP 32bit VM using VMWare Player
2. Make sure you add an LPT port (set to auto, not connected on startup). It doesn’t matter if your actual PC has an LPT port or not this is needed for the dongle crack later.
3. Install VMWare tools for your VM
4. After you have the windows VM up and running install the BOSH MDI drivers found here: https://www.boschdiagnostics.com/ (the MDI drivers on the driver disk and vxmanager installer wouldn’t install on my xp 32bit VM but the one from bosh does).
5.From the driver disk or from allscanner.com install the VXDIAG MDI package with pass thru driver (VXDIAG MDI manager or VXDIAG Manager)
Download tis_data_1.iso, tis_data_2.iso, GM-NAO-TIS200-3_2008.iso, TIS2000DongleCrack.rar from this: http://auto-professionals.co/?dl=5847273d53a0b0635724a7b3e1626ef7 (password: mhhauto) or buy a tested TIS2000 crack such as https://www.autonumen.com/goods-1568-GM-Tech2-Scanner-for-GM-SAAB-OPEL-SUZUKI-ISUZU-Holden.html and the like
6. (files / instructions in the updated.txt you may need to click the link more than once if you get an error when downloading)
7. Mount the tis_data_1.iso in your VM (use the virtual cdrom in vmware player and attach to iso file) this will start the auto install of the TIS2000 2007.3 software)
8. All options can be installed using the default selections however make sure you check the install checkbox above the parallel security device on the one screen.
9. After installation is complete you can extract the TIS2000DongleCrack.rar and copy the folder to the desktop of your VM
10. Go into the TIS2000DongleCrack folder locate the drivers folder and open it, run the DDINST32.EXE (if you get a registry error you didn’t install an LPT port in your VM), select Express and it should install the files then click ok / Exit to close.
11. Go back to the main TIS2000DongleCrack folder and copy SCAControlUI.exe and Id.dll to c:\Program Files\cosids\bin\ (it will prompt to replace id.dll select yes).
12. Go back to the main TIS2000DongleCrack folder into the Dongle folder and copy the 2 files in there to c:\windows\system32\ (the dongle crack is now installed)
13. Now mount the tis_data_2.iso in your VM (use the virtual cdrom in vmware player and attach to iso file) and open TIS2000 (double click the icon on your desktop) when TIS opens it will ask you if you want to upgrade click yes.
14. After the upgrade completes mount the GM-NAO-TIS200-3_2008.iso in your VM (use the virtual cdrom in vmware player and attach to iso file) and open TIS2000 (double click the icon on your desktop) when TIS opens it will ask you if you want to upgrade click yes.
15. After the upgrade completes you have successfully installed TIS2000 2008.3 and the Dongle crack, now we need to configure TIS to use the VXDIAG GM nano
16. Open TIS2000 from the icon on your desktop, select Configuration menu from the top and select IO Management.
17. Click the Driver button, click the Browse button, locate the j2534.dll file in the window and click open (installs the J2534 Pass Thru Driver)
18. Now click the Add button (in IO management) enter exacly “Generic Pass Thru” in Logical Name and select “J2534 Pass Thru Driver” in the Driver drop down, click OK.
19. Select Generic Pass Thru in the list and click Properties, in the Device Name drop down select VXDIAG, (ALLScanner) and click ok then click close to close IO Management.
Now TIS2000 software is installed and configured all you have to do is connect your VXDIAG device to the PC / VM. To do this first use a usb and connect it to the PC then in the VMWare player menu go in removable devices and connect the Future Devices USB to serial converter. At this step my windows install didn’t have the basic usb to serial drivers so I connected the VM to the network (if not connected use the VMWare player menu to connect the network) and windows downloaded them from the net and installed the device as com3. you are now good to go.
At this point you can now click on SPS in TIS2000 select Generic Pass Thru as your device and your good to program!!
Satisfied, VXDIAG VCX NANO GM device works as a clone to the GM MDI.
Leave a Reply