
What the function of TIS2000 software CD?
GM Tech 2 is a standalone scan tool mainly used for diagnostic function, but with the additional TIS2000 software dongle, it is possible to carry out ECU programming for GM vehicle models (after 2007).
Operating system:
A laptop with COM port running Windows XP operating system
NOTE: PCs validated to function with all Tech line applications including TIS Service Programming System (SPS). Other laptops may not support SPS or communicate properly with the Tech 2 and will not be supported for hardware communication issues.
Window 64 bit or 32 bit:
64-bit versions of Windows contain backwards compatibility with 32-bit applications, but not with 16-bit applications. And 32-bit versions of Windows are backwards compatible with 16-bit applications. The problem with installing TIS2000 on newer machines is that, while the TIS2000 program itself is 32-bit, the installer and drivers are 16-bit. Therefore, you are able to install TIS2000 natively on ANY 32-bit Windows system. This will just work, without having to run anything in compatibility mode.
Windows 8 32 bit:
However, if you have a 32-bit copy of Windows 8 installed (I don’t wanna know why you do), running 16-bit applications are disabled by default. You can enable it by going to Control Panel and clicking on 16-bit Application Support then clicking Enable.
Windows 7 with XP Virtual PC:
For those of you with genuine copies of Windows 7 Professional, Enterprise, or Ultimate with a multi-core processor (who doesn’t run Win7 on a multi-core these days); these versions of Windows 7 allow you to use Windows Virtual PC, which lets you virtually run Windows XP Pro without a disc or OS installation. You need to install Windows XP Mode and Windows Virtual PC in order to use it. Before you can download these updates, M$ makes you run a little .exe that checks if your OS install is legitimate. Anyway, after you get that all installed and XP Mode is booted, you can copy the OP’s cracked TIS2000.zip over to the WinXP Desktop and follow the README.txt inside to install it. Here is a link with the cracked TIS2000
https://www.autonumen.com/goods-1568-GM-Tech2-Scanner-for-GM-SAAB-OPEL-SUZUKI-ISUZU-Holden.html
Step-by-step TIS2000 software dongle installation:
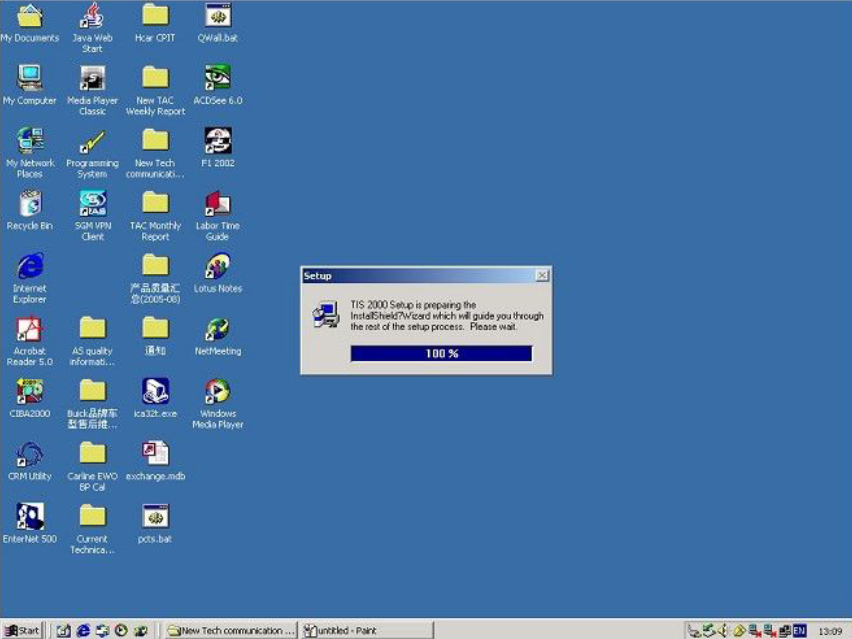
1. After loading the TIS2000 installation CD into the computer’s CD drive, the system will automatically execute the installation process: Be careful not to open other software
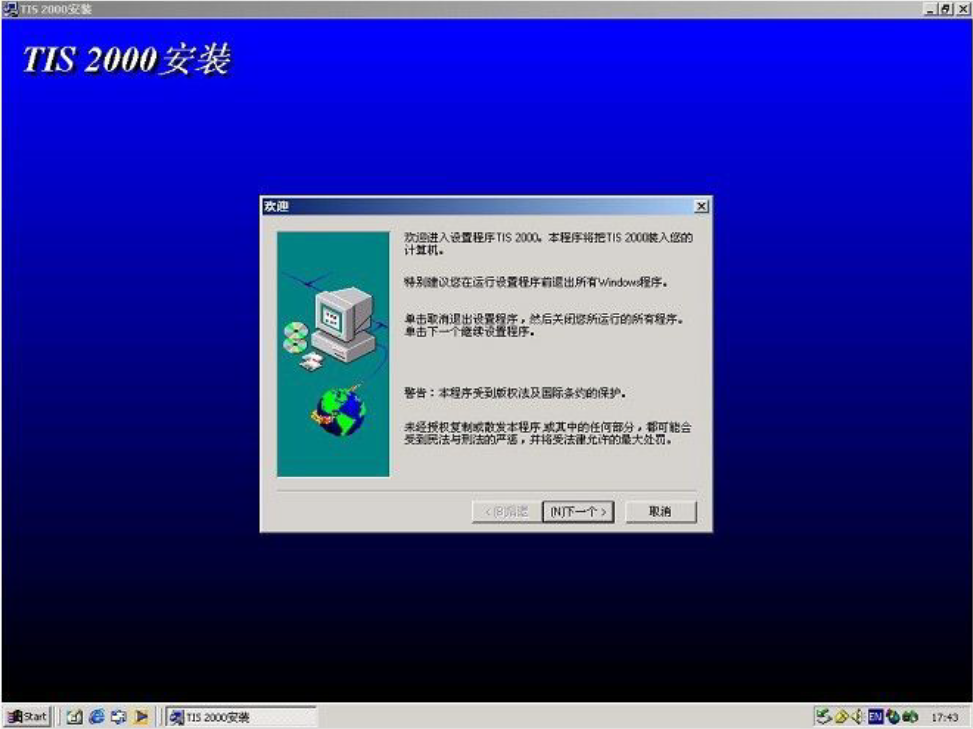
2. Select “Next”;
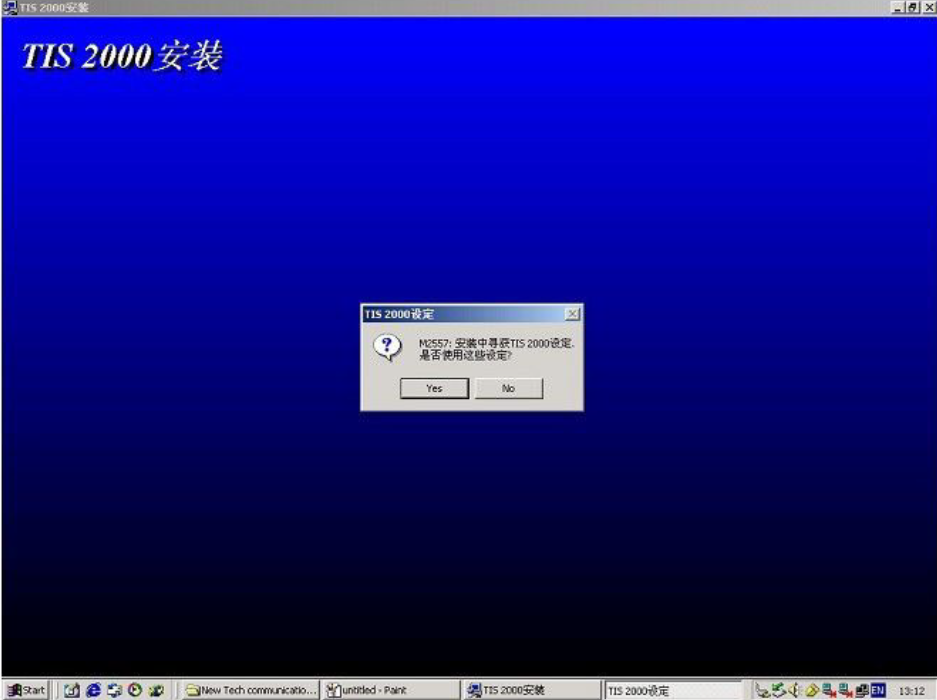
3. Select “Yes”
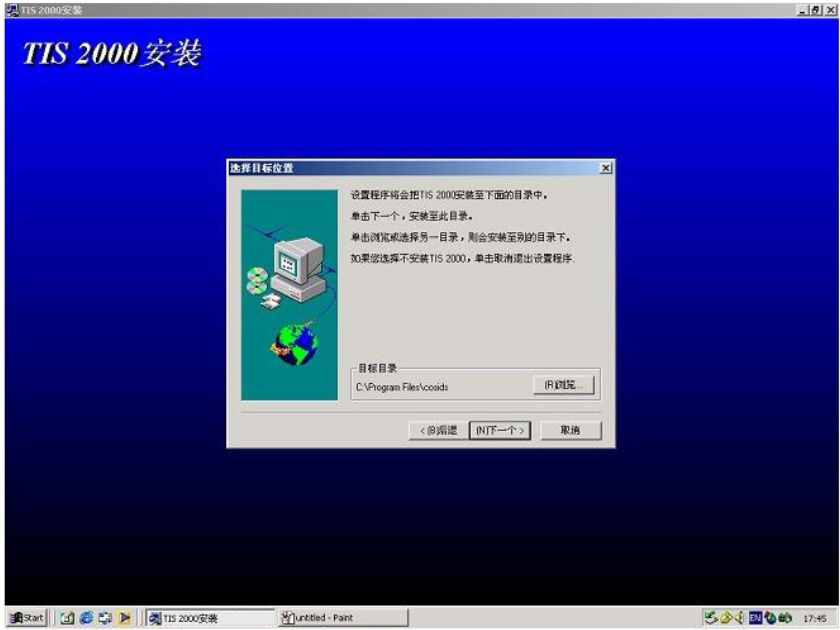
4. Under normal circumstances, the default installation area of TIS 2000 system is the “C drive” of the computer. It is recommended that the service center do not change its installation path, and select “Next” in the following interface;
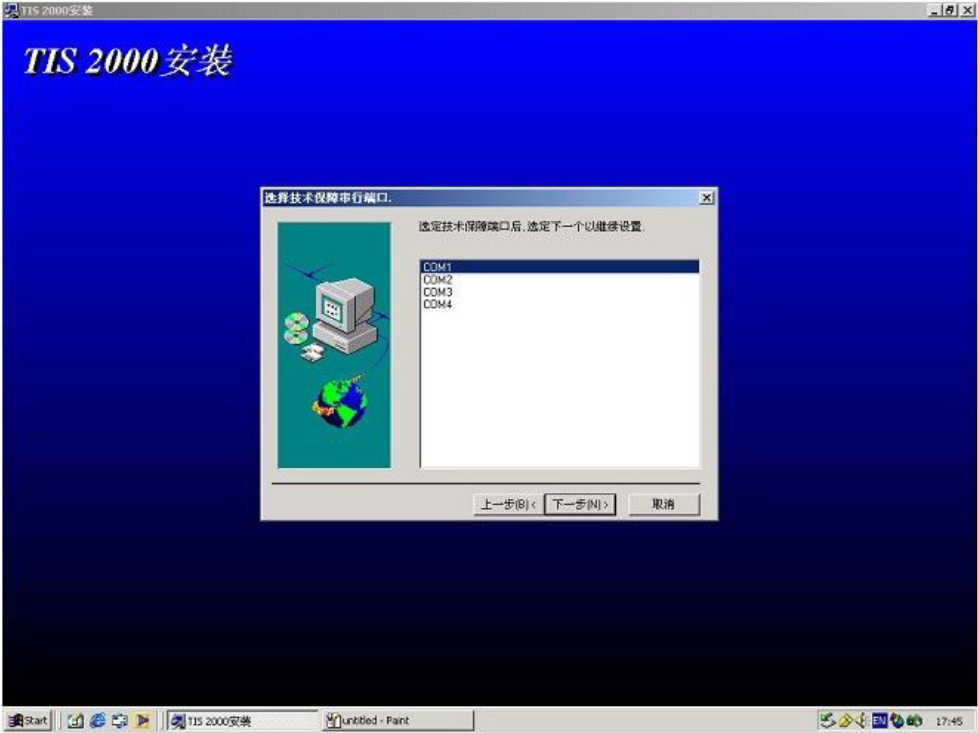
5. Select “COM1”;

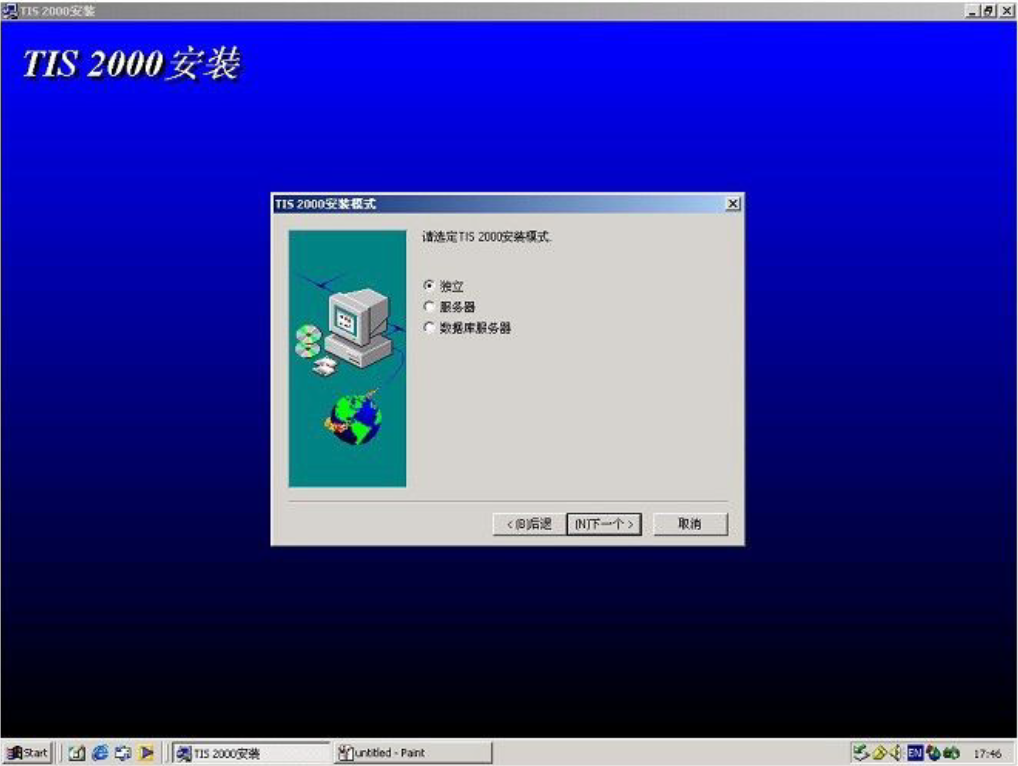
6. Select “Independent”
7. Select “NAO”

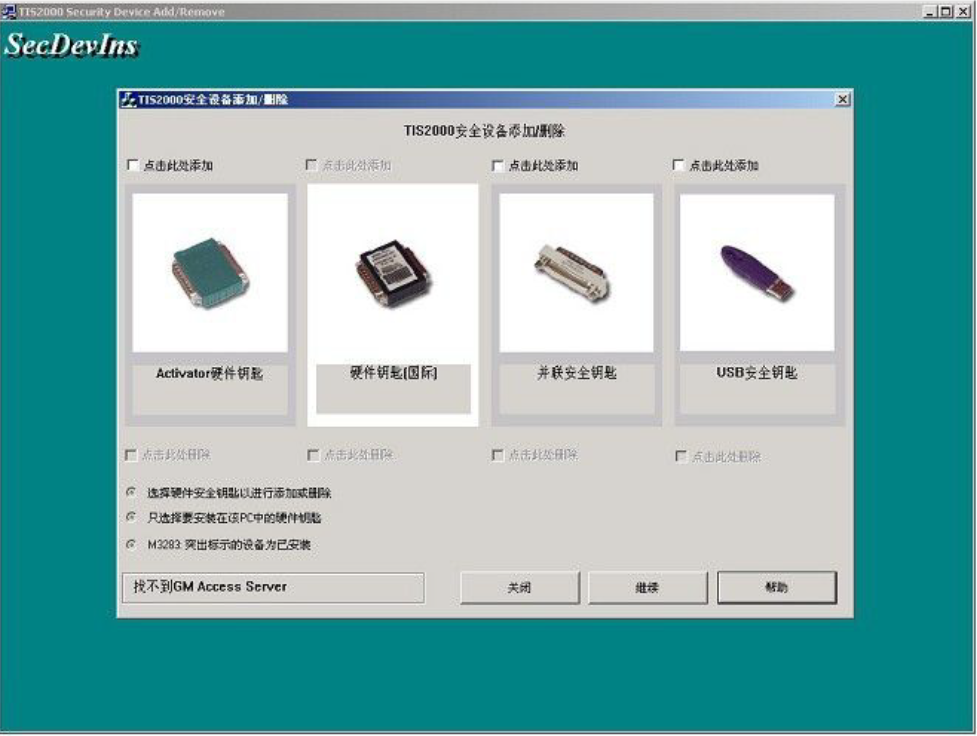
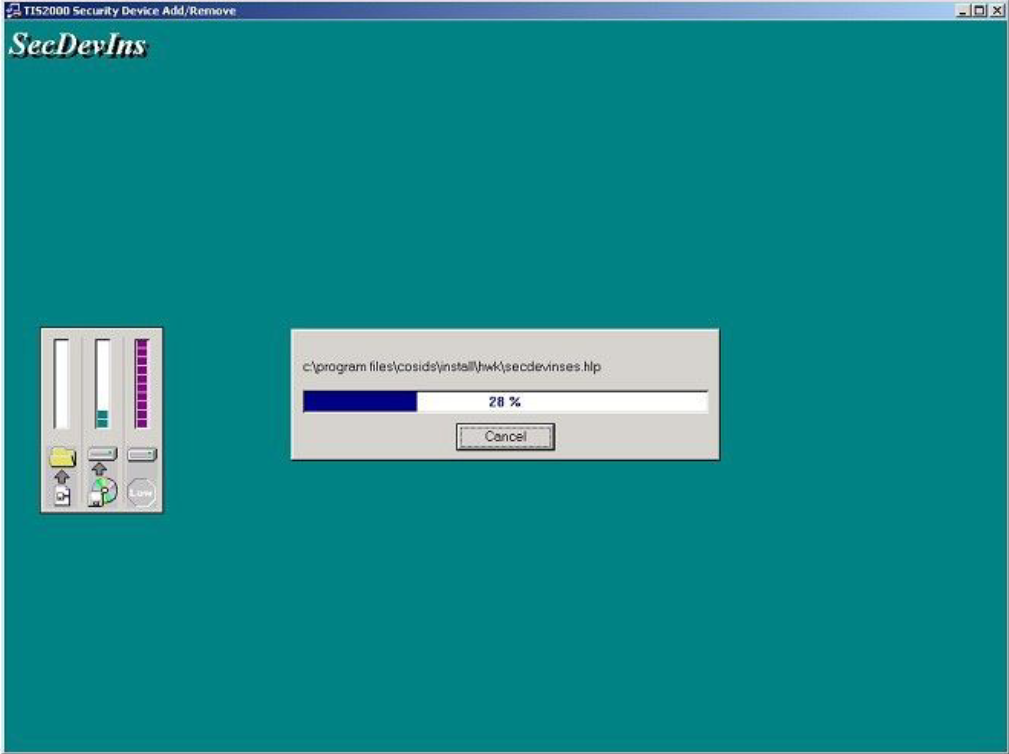
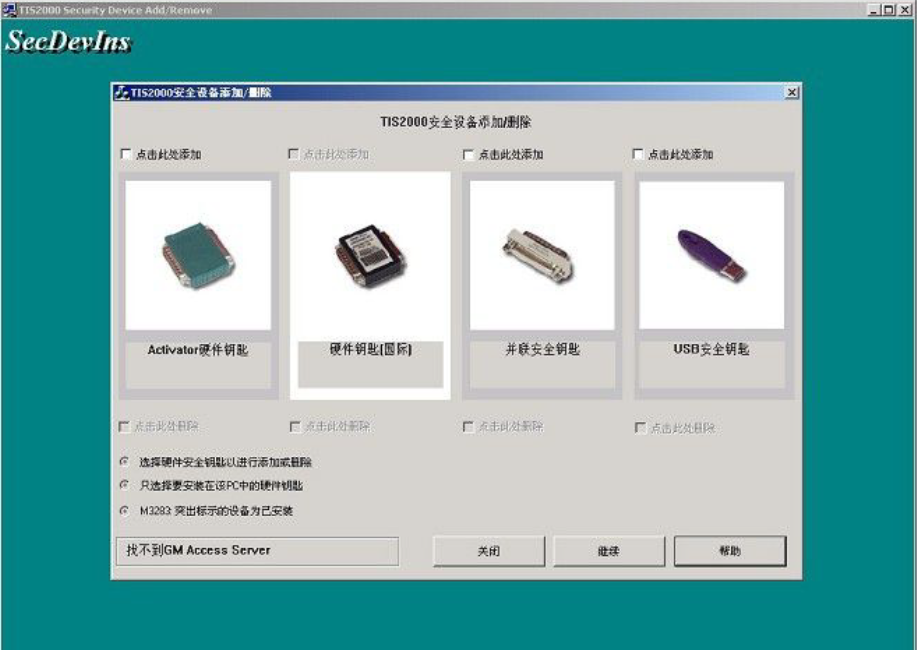
8. Please select the TIS 2000 hardware key according to the actual situation in the following interface, and you can select it by “click here to add”;
(1) The green “Activator hardware key” is the hardware key (Hardware Key) used by GM early;
(2) The purple “USB Security Key” is currently a commonly used hardware key
9. The following interface will display the installation process of the system:
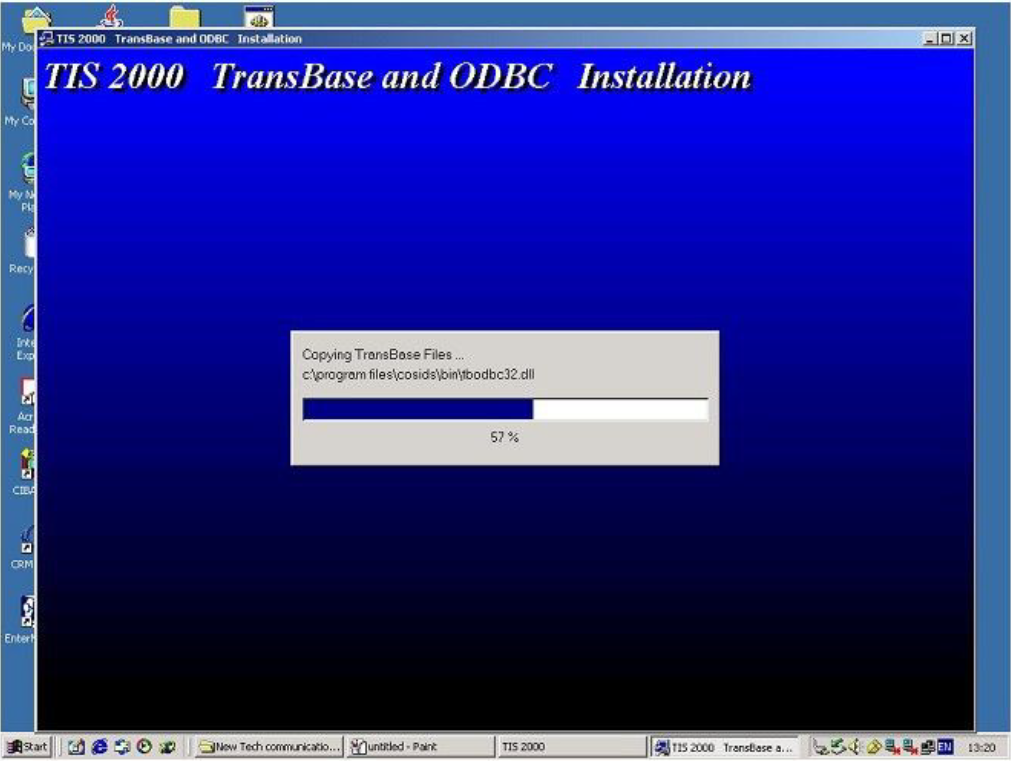
10. The following interface will display the installation process of the system

11.
12. The entire installation process will take more than ten minutes; at this time, the “TIS 2000” icon will appear on the desktop of the computer
Note: Please close the computer’s screen report program before installing the TIS 2000 system;
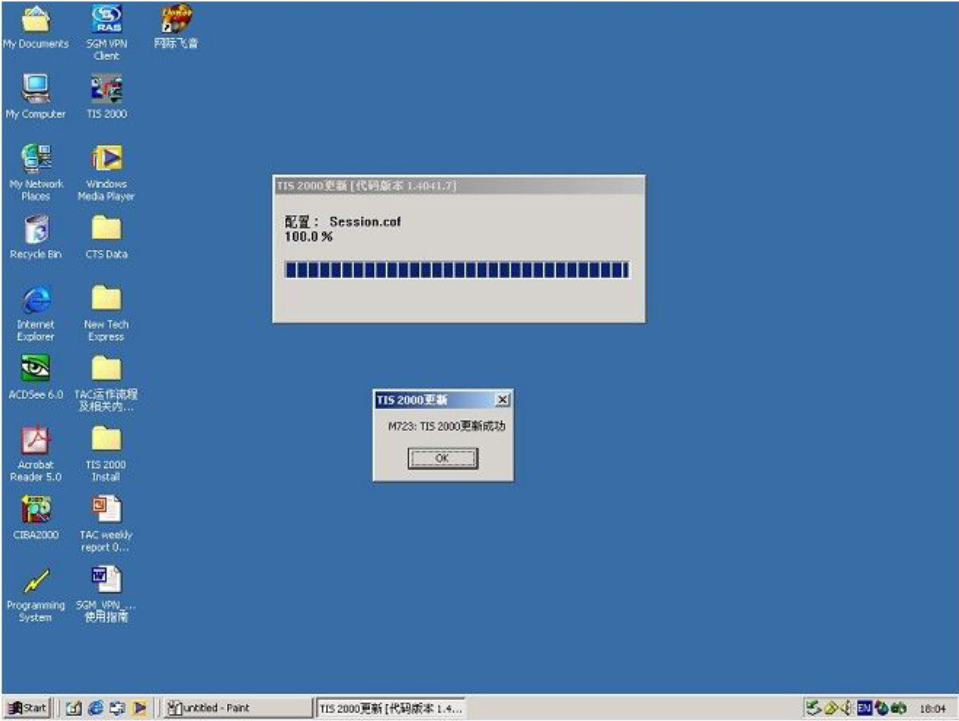
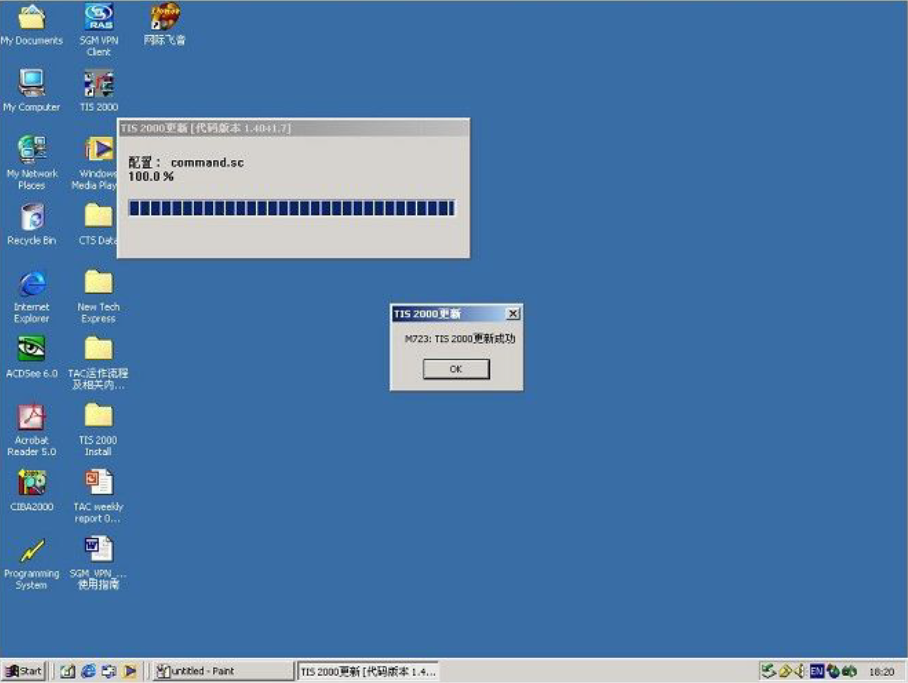
13. If all goes well, the installation user will prompt “M732, TIS 2000 updated successfully” after completing the relevant procedures on the TIS 2000 installation CD
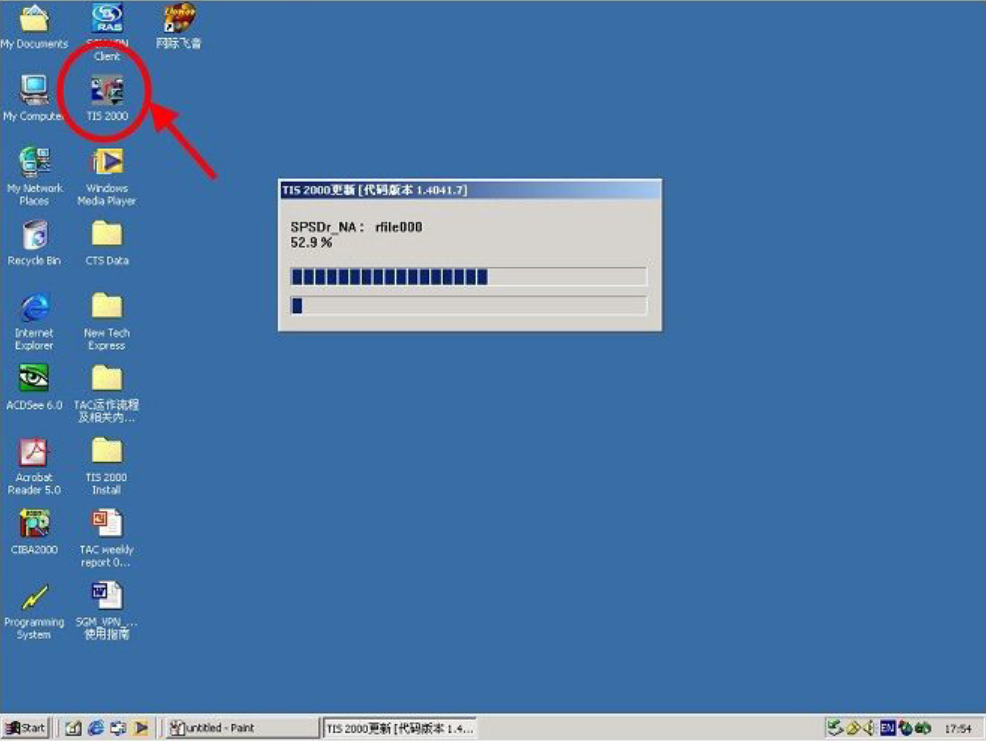
14. After removing the “TIS 2000” installation CD, insert the “TIS 2000” data CD to perform data update
Note: After inserting the “TIS 2000” data CD, wait for the CD drive to run for 10 seconds or stop running, and then click the “TIS 2000” icon on the computer desktop

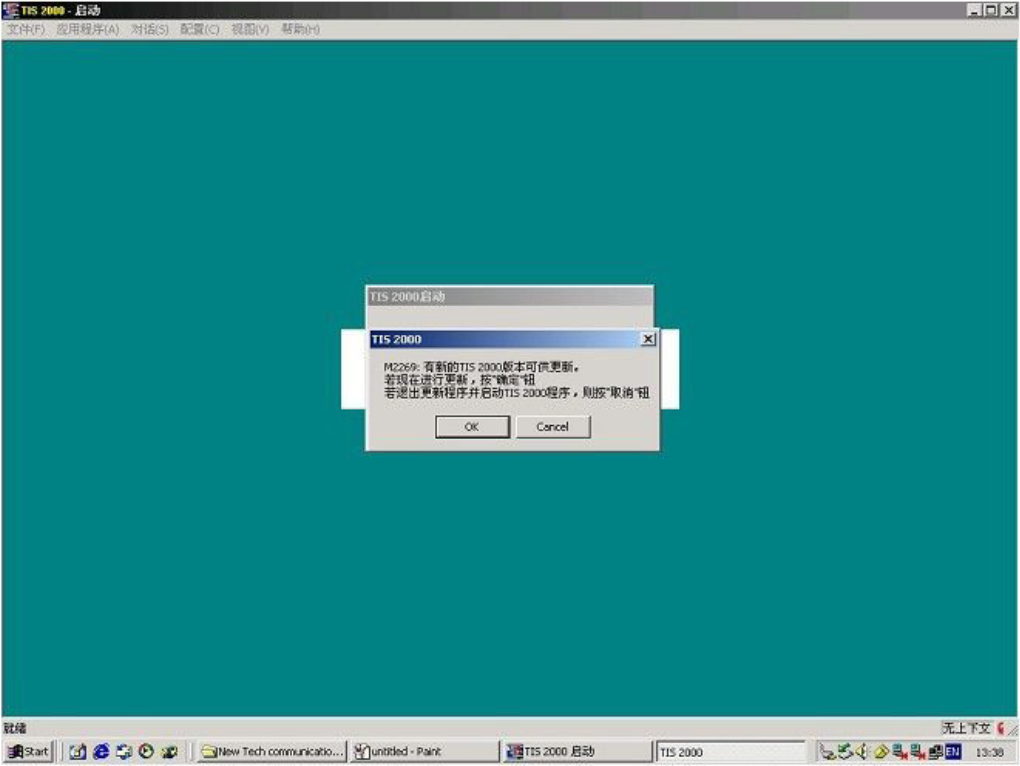
15. The system will display a dialog box after searching for updated data, click “OK” to complete the operation
16. If all goes well, the installation user will prompt “M732, TIS 2000 updated successfully” after completing the relevant procedures on the TIS 2000 installation CD
At this point, the TIS 2000 system has completed all installation operations and can perform various functions.
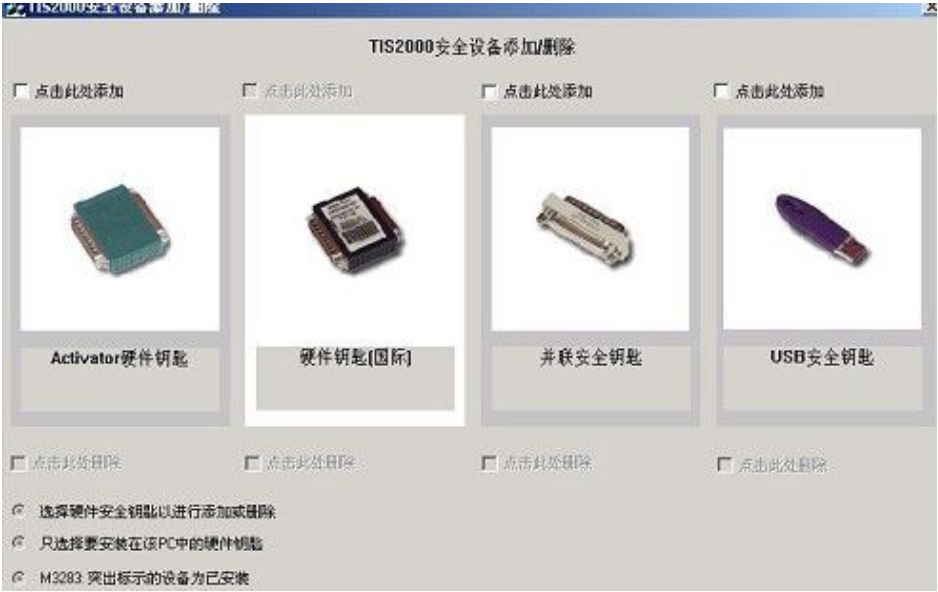
17 Please select the TIS 2000 hardware key according to the actual situation in the following interface, and you can select it through “click here to add”;
(1) The green “Activator hardware key” is the hardware key (Hardware Key) used by GM early;
(2) The purple “USB Security Key” is a commonly used hardware key;
18.
Leave a Reply